Adding Existing Backup Repositories
NAKIVO Backup & Replication provides you with the ability to add an existing Backup Repository to a new copy of the product.
Important
During the import process, NAKIVO Backup & Replication searches for the "NakivoBackup" folder in the specified location, so if your Backup Repository is located in E:\backup\NakivoBackup, you need to specify the following path: E:\backup
To import an existing Backup Repository, do the following:
-
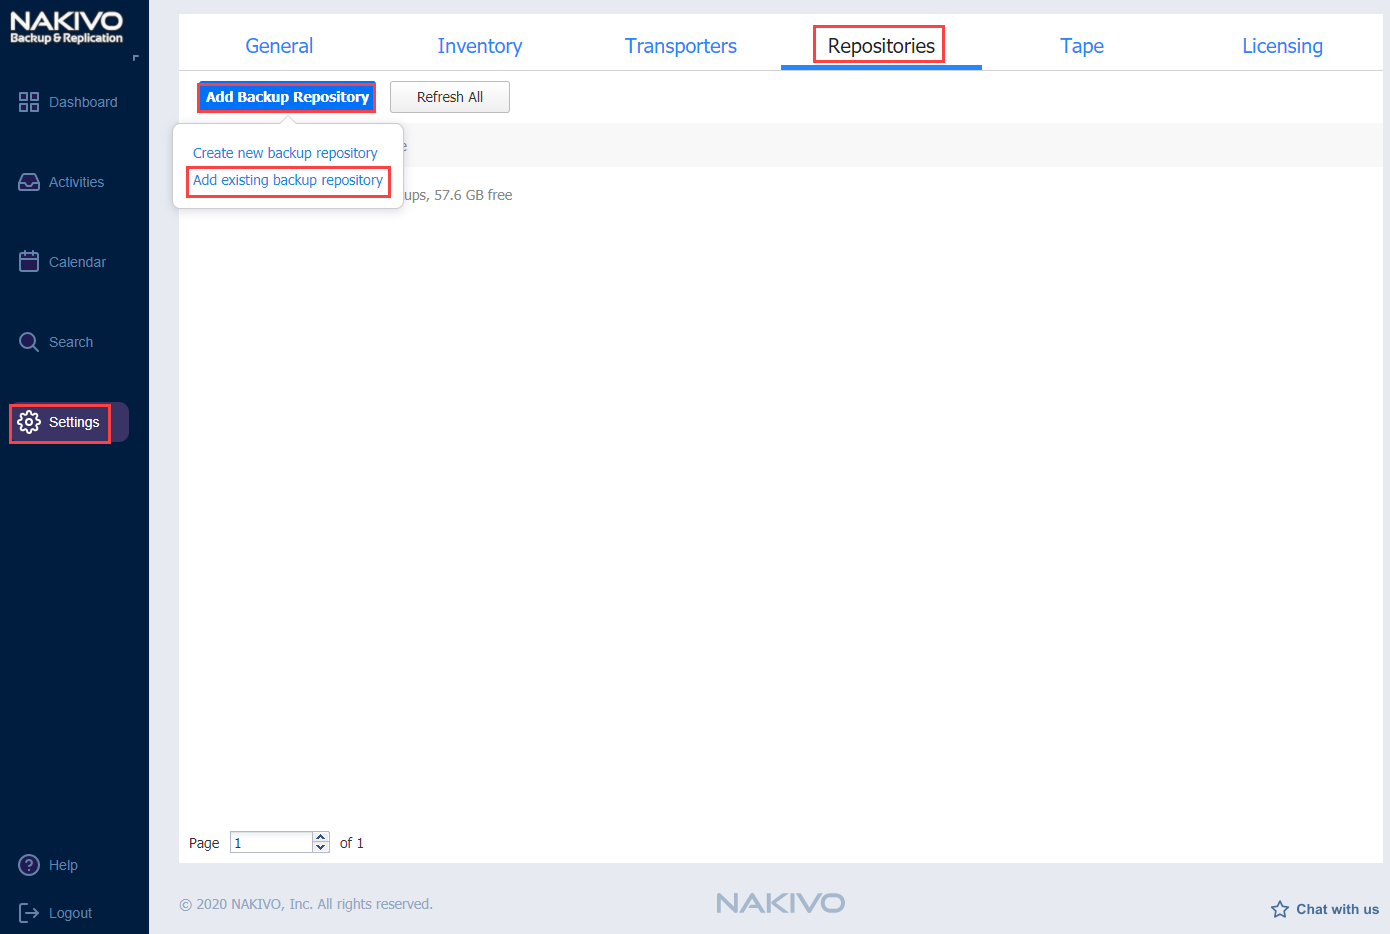
Go to the main menu and click Settings.
-
Go to the Repositories tab and click Add Backup Repository.
-
Click Add existing backup repository in the dialog that opens.
-
The Add Existing Backup Repository wizard opens. On the Type page of the wizard, select
one of the following Backup Repositorytypes :-
Local Folder
-
CIFS Share
-
NFS Share
-
Amazon EC2
-
Amazon S3
-
Wasabi
-
SaaS
-
Deduplication Appliance
-
-
On the Name & Location page of the wizard, fill out all the necessary fields the way it's described in the article for the corresponding Backup Repository type.
-
On the Options page of the wizard,
depending on the repository type, the following options can be available for configuration:-
Encryption password: If the Backup Repository is encrypted, type in the encryption password.
-
Enable automatic repository self-healing: Leave this option selected to automatically trigger repository self-healing in case the product detects symptoms of problems in the backup infrastructure (such as incorrect timestamps on metadata and data files). You can deselect this option and run self-healing manually.
-
Run repository self-healing on schedule: If required, select this checkbox to additionally run repository self-healing on schedule. You can configure the schedule by clicking the schedule link when the option is selected. The default schedule is set to run every day at 11 AM.
-
-
On the Options page of the wizard,
depending on the repository type, the following options can be available for configuration:-
Encryption password: If the Backup Repository is encrypted, type in the encryption password.
-
Enable automatic repository self-healing: Leave this option selected to automatically trigger repository self-healing in case the product detects symptoms of problems in the backup infrastructure (such as incorrect timestamps on metadata and data files). You can deselect this option and run self-healing manually.
-
Run repository self-healing on schedule: If required, select this checkbox to additionally run repository self-healing on schedule. You can configure the schedule by clicking the schedule link when the option is selected. The default schedule is set to run every day at 11 AM.
-
Run full data verification on schedule: If selected, the product will run full verification of all data available in the Backup Repository on the specified schedule. The product will read each block of data and ensure that it is identical to the data block that was read on the source VM during the backup process. This way the product will verify each recovery points in the Backup Repository.
Backup verification is a time-consuming process and consumes CPU of the Transporter assigned to the Backup Repository. It is recommended to schedule backup verification during non-working hours.
-
Reclaim unused space on schedule: If required, select this option to run the Backup Repository space reclaim process on schedule. You can configure the schedule by clicking the schedule link when the option is selected. The default schedule is set to run every Saturday at 12 PM.
-
Enforce explicit file system sync: If selected, explicit sync with the file system will be enforced during all backup operations to this repository. This setting is considered more reliable but may lead to lower performance on some storage devices.
-
Detach this repository on schedule: Select this option if you want to detach and then reattach the Backup Repository on a schedule. Detaching a Backup Repository saves the Backup Repository data and metadata in a consistent state and stops the product interaction with the Backup Repository (so that the Backup Repository can be copied or moved). You can use this feature, for example, for the disk-to-disk-to-tape (D2D2T) data protection approach, in which backups are stored on a disk for fast operational recovery, and copied to a tape (while the repository is detached) for archiving and long-term storage.
-
Delete and re-create the repository on attach: If this option is selected, all data in the Backup Repository will be erased prior to attaching it to the product. As a result, jobs that write to this Backup Repository will create full VM backups. You can use this option, for example, to create full daily, weekly, or monthly VM backups and write them to tape or removable media.
-
-
-
Click Finish. The Backup Repository is imported.
-