Recovery Job Wizard for Hyper-V: Destination
On the Destination page, select a location for the recovered VMs.
- Setting the Same Host, Datastore, and Network for All Recovered VMs
- Setting the Default Destination for Recovered VMs
- Setting Different Options for Recovered VMs
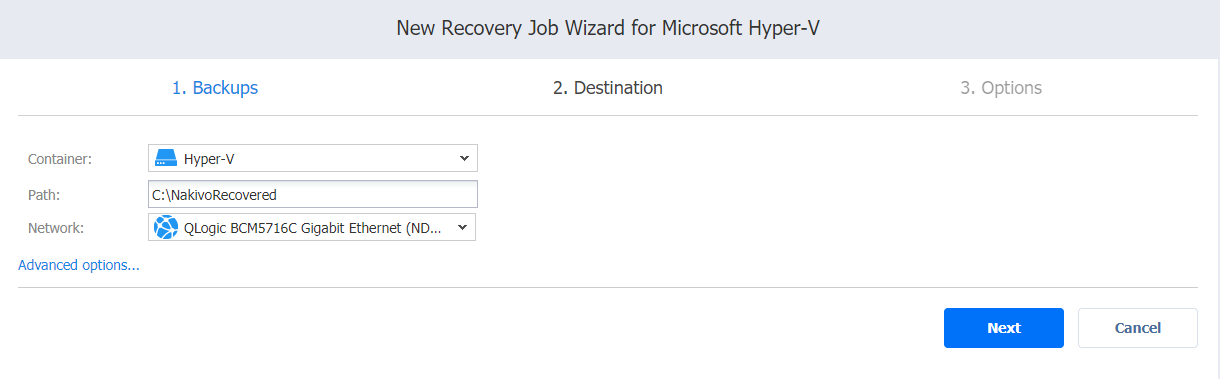
Setting the Same Host, Datastore, and Network for All Recovered VMs
To recover all VMs to the same server and location and to connect all recovered VMs to the same networks, follow the steps below:
-
Choose a server from the Container drop-down list.
-
Type a location in the Path field. It can be a local or a shared path.
-
Choose a network from the Network drop-down list.
Note
To connect to a shared path successfully, the following conditions must be met:
- The shared path is created with the same credentials as the corresponding Hyper-V container that was added. See Adding Hyper-V Servers for details on adding Hyper-V containers to NAKIVO Backup & Replication.
- The logon session in which you created the shared path has not been ended.
As a workaround, create a symbolic link to the shared path from the Hyper-V container. Refer to Step 7 of High Availability of NAKIVO Backup and Replication for details.
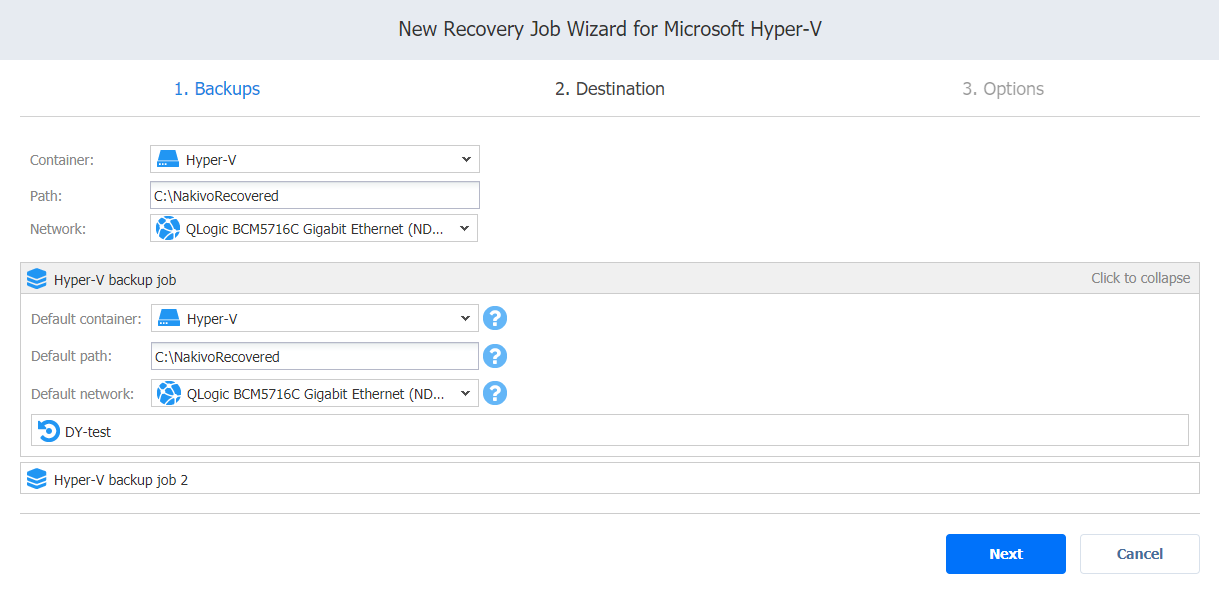
Setting the Default Destination for Recovered VMs
If you have chosen a host, cluster, folder, or a Backup Repository as a source for your recovery job on the Backups page, you can set the default container, datastore, and VM folder for the recovered VMs. To do this, follow the steps below:
-
Click Advanced options and then click on the name of the chosen host, cluster, folder, or a resource pool.
-
Choose a Default container.
-
If you have chosen the backup job on the Source page, you can choose a Default Network.
-
Optionally, you can also choose a Default VM folder.
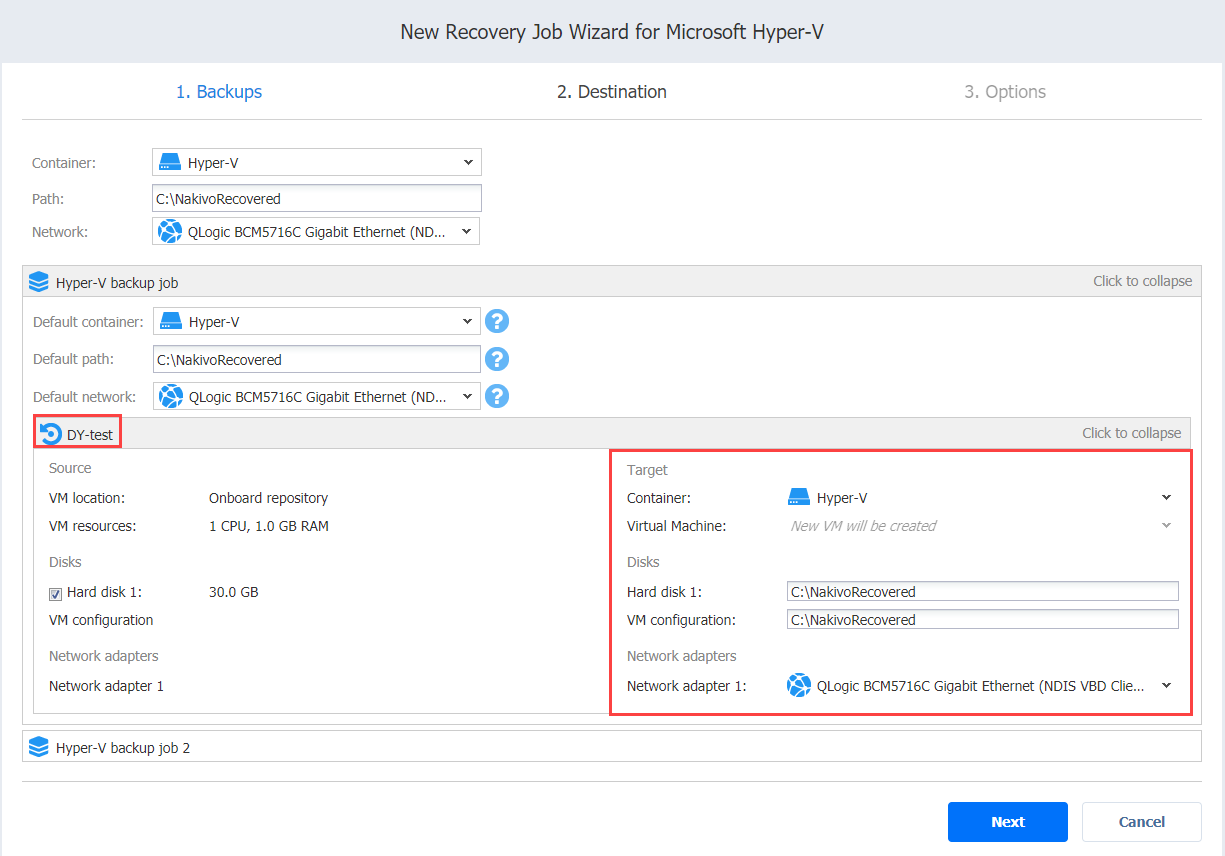
Setting Different Options for Recovered VMs
To specify different options for recovered VMs, follow the steps below:
-
Click Advanced setup.
-
Choose a target container, disk, and network adapter for each VM.
-
Click Next to go to the next step.